Bathroom Tile Layout Planning: A Checklist for a Cohesive Finish
Quick Answer: Bathroom tile layout planning is the process of arranging tile, joints, cuts and edge finishes across the actual room before installation. Start with the intended appearance, identify the visible corners and stopping points, and review the proposed arrangement with the installer. A continuous visual effect does not mean eliminating joints or ignoring the requirements of the selected materials.
FMG Remodeling & Design illustrates this checklist with its Rancho Bernardo guest bathroom and the owner's account of its 45-degree corner work.
You love the tile sample. But what happens when that pattern turns the corner? Decide after cutting starts and the pieces already prepared may no longer represent the finish you pictured.
This guide follows one real design goal through that corner decision, then gives you a sheet to use before your own installation.
One less obvious detail belongs on that sheet too. We return to it after the corner options.
By Anatoly, owner of FMG Remodeling & Design.
What did the Rancho Bernardo bathroom need to achieve?
In our Rancho Bernardo guest bathroom, the goal was a monolithic appearance because of the tile's characteristics. The tiled areas needed to read as one coherent composition.
For this Rancho Bernardo guest bathroom, the work included designer tile imported from Spain and 45-degree corner cuts, with careful measurements to maintain continuous lines.
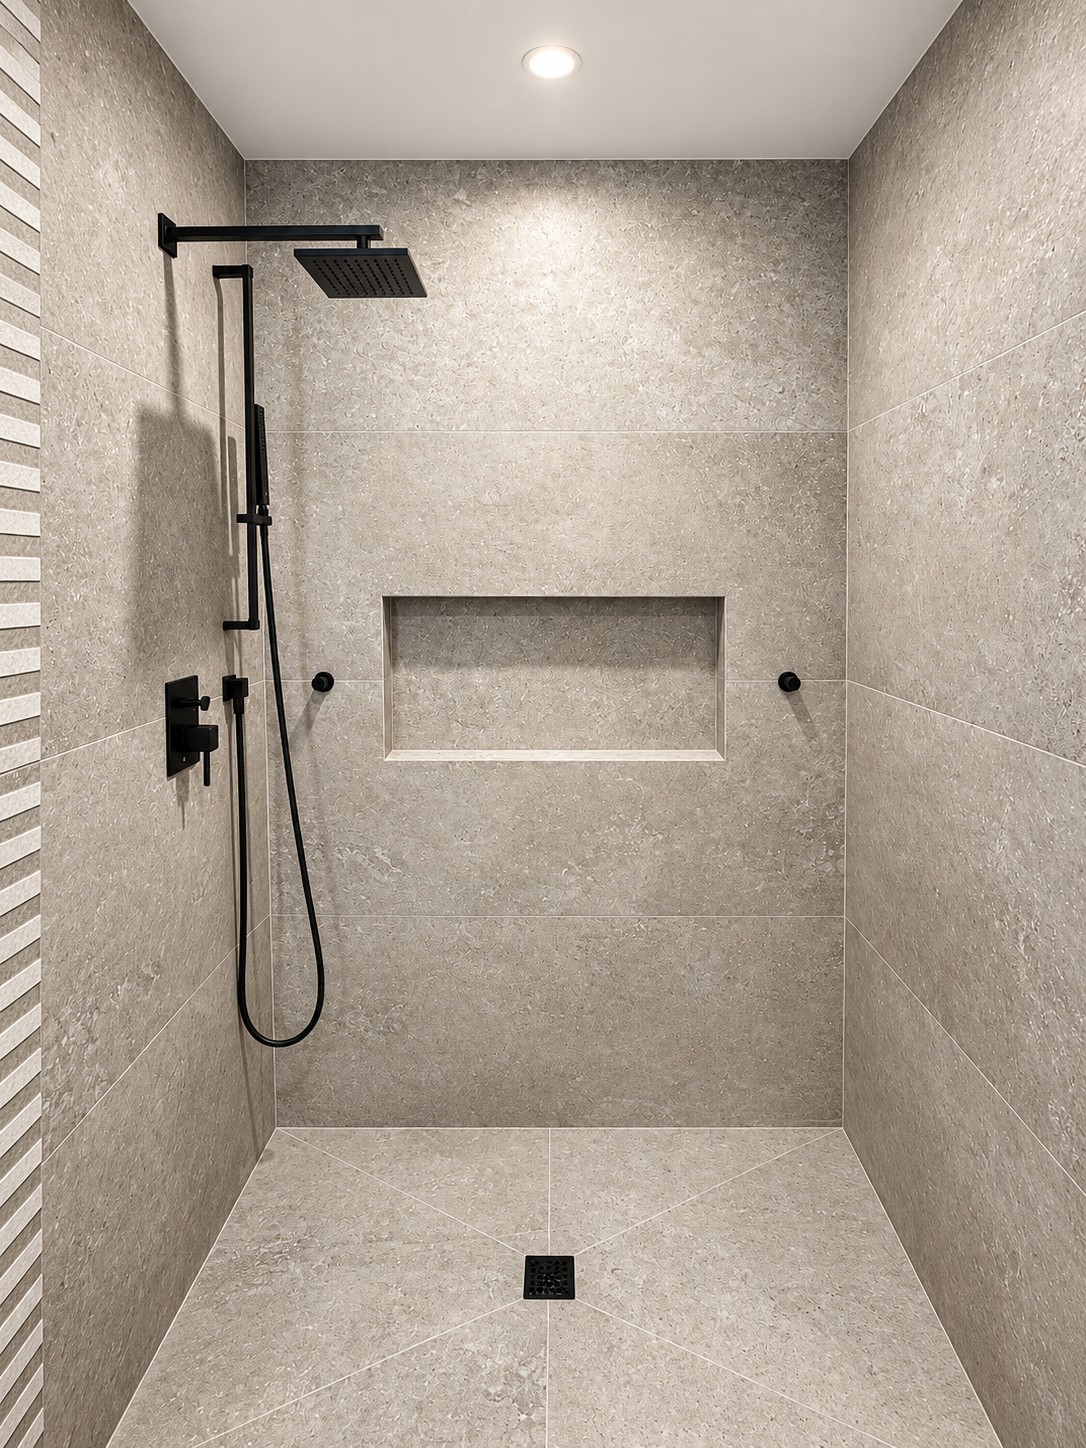
FMG's Rancho Bernardo guest bathroom. The photo shows the tiled shower, recessed niche and visible joint lines. The project account, rather than the photograph alone, documents the 45-degree corner cuts.
From this real bathroom to a planning decision
| Known project detail | What it helps explain | A question for another bathroom |
|---|---|---|
| The owner wanted a monolithic visual effect | The intended appearance guided the detail | Which surfaces should read as one composition? |
| The work included 45-degree corner cuts | A visible corner was part of the design, not an afterthought | What finish will suit the actual tile at this outside corner? |
| The matched project photo shows a recessed niche | The tiled surface also has openings and returns | How should the chosen layout relate to the niche? |
The questions are for your bathroom. See the Rancho Bernardo guest bathroom in our portfolio for the matching project images.
If you have chosen a reference photo, you have already made a useful first decision. Now circle the corner or pattern that makes it work for you. Your mark turns a general style preference into a detail someone else can understand.
What belongs in bathroom tile layout planning?
The layout should account for the room, not just a loose tile. The Tile Shop's shower layout guide describes marking a tile grid before installation so necessary cuts can be anticipated at corners.
Ask to review the arrangement before installation starts. A sketch, marked photograph or sample arrangement can record the choice; the installer still needs site measurements and product instructions.
Start with a view you care about, such as the wall seen from the doorway. Then follow the proposed lines to the places where the surface changes direction or ends. Ask how the visible cuts and edges will look together.
For a full project, connect those choices to the bathroom remodeling scope. Changing a design detail can affect the work that needs to be included; it should not be left as an assumption between the picture and the proposal.
Does a continuous appearance require the same corner finish everywhere?
No. The appearance you want and the edge solution selected for the project are related decisions, not interchangeable terms.
For example, Schluter describes QUADEC as an edge-protection and finishing profile for tiled edges and outside corners. Its instructions call for selecting the profile according to tile thickness and format. A visible profile is therefore a specific finish option, not evidence of an incomplete design.
The Rancho Bernardo project used 45-degree corner cuts. Another project might use a profile or another suitable finishing detail. Ask to see how the proposed detail relates to your actual tile and intended appearance, and confirm the product-specific installation requirements with the installer.
What should be agreed before installation?
The Look, Edge, Record checklist is a planning aid that connects the appearance you want, the proposed corner finish and a written decision. Use it to prepare a conversation about your room; it is not a construction specification.
First mark the look in your photo. Next identify each visible edge. Finally record the choice and anything unresolved.
If you can name your priority wall, you are ready to fill in the first two rows. Keep your own sheet beside the reference image during the discussion.
| Detail | Our choice or reference | Still to resolve |
|---|---|---|
| Intended appearance | Photo or sample: ______ | ______ |
| Main view | Priority wall or area: ______ | ______ |
| Lines and cuts | Sketch or marked photo: ______ | ______ |
| Visible edges | Proposed finish: ______ | ______ |
| Exact tile | Product identification: ______ | ______ |
| Decision record | Person and agreed record: ______ | ______ |
The easily missed item is the decision record: who agreed to which reference? Save the marked image with the sheet before cutting starts. It records the intended appearance; joint widths, waterproofing and technical tolerances still depend on the selected assembly.
Keep budget and timing questions connected to their own scope. Our bathroom estimate guide explains the importance of defining the work. Our bathroom scheduling guide explains preparation and construction dependencies. Neither can replace the actual plan for the bathroom in front of you.
Questions about bathroom tile layout planning
Is choosing tile the same as bathroom tile layout planning?
Tile selection identifies the material and appearance of the individual product. Layout planning addresses how it is arranged in the room, including lines, cut pieces and visible stopping points. A sample can help establish the desired surface, but the room and its corners still need to be considered before installation.
What does a monolithic appearance mean in this example?
In FMG's Rancho Bernardo example, monolithic describes the intended visual effect: the tiled areas were meant to read as a coherent composition. It is a description of design intent, not a claim that the installation has no joints, uses one slab or follows a universal corner detail.
Are 45-degree corners always the best choice?
The Rancho Bernardo project used 45-degree corner cuts, but that does not establish a rule for every bathroom. The appropriate finish depends on the actual tile and project detail. Manufacturer-designed edge profiles are another option. The chosen approach should be reviewed against the appearance requested and the relevant product requirements.
What information helps a tile-layout discussion?
The exact tile identification, a sample when available and a reference photograph can make the discussion more specific. Mark the part of the photograph that matters: a corner, pattern direction or visible edge. The installer still needs the actual site conditions and product information to assess a suitable arrangement.
Can a tile-layout checklist determine the price or schedule?
A checklist records design decisions and unresolved details; it is not a quote or construction calendar. The agreed detail must be considered within the actual bathroom scope, selected materials and installation requirements. Costs and timing should be confirmed for that project rather than inferred from another bathroom's photograph or finish.
Make the intended finish part of the conversation
Picture the first view through your bathroom doorway. The wall, its corner and the niche read together, rather than as three unrelated choices. That is the appearance to describe before work starts, without assuming the same finish belongs in every room.
Rancho Bernardo's lesson is specific: the monolithic appearance was the goal, and the 45-degree corner work served it. Your chosen tile may call for another answer. The useful starting point is your marked photograph and completed decision sheet.
Discuss the details that matter in your bathroom
Bring the tile identification, your reference image and the Look, Edge, Record sheet. The remaining question is which detail in your room should lead the whole arrangement. Point to it when you tell us about your bathroom project.
Our remodeling estimates describe work by category with one total price. Your bathroom tile layout planning can therefore become part of a defined scope, rather than a finish everyone assumes someone else has settled.
